
Desserts
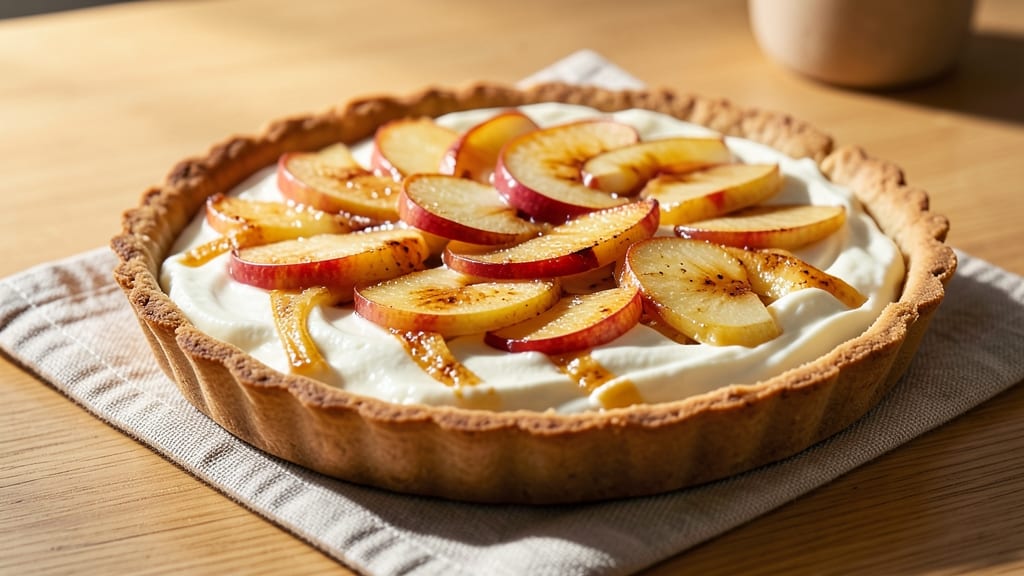
This apple cheesecake tart recipe combines the best of two desserts into one showstopping treat—buttery tart crust layered with creamy cheesecake filling and topped with spiced apples. 🍏 The secret lies in blind-baking the crust to perfection, ensuring it stays crisp while supporting the rich filling.
I developed this recipe after years of perfecting individual components, and the result is a dessert that looks elegant enough for holiday gatherings but simple enough for a weeknight indulgence.
The foolproof technique starts with a flaky, golden crust that holds its shape even after baking, while the cheesecake layer remains silky and smooth. What sets this apart is the spiced apple topping—caramelized just enough to soften slightly and release its natural sweetness without overpowering the cheesecake.
The combination of textures and flavors creates a balance that’s both comforting and sophisticated, making it a crowd-pleaser every time.
By the time you slice into these tarts, you’ll have a dessert that’s visually stunning with its golden crust, creamy filling, and glossy apple topping. The crust stays crisp at the edges while remaining tender in the center, and the cheesecake layer holds its shape without cracking.
Each bite delivers a perfect harmony of sweet, tangy, and buttery flavors, proving that homemade desserts can be both impressive and achievable.
Perfect for holidays, potlucks, or a special treat, these tarts are easy to customize—add a drizzle of caramel or a sprinkle of cinnamon for extra flair. Let’s get started on creating these irresistible desserts that will have everyone asking for seconds.
Ingredients for apple cheesecake tart
Sixteen ingredients transform into showstopping tarts with perfect buttery crust and spiced apple magic.
| Ingredient | Amount | Notes |
|---|---|---|
| All-Purpose Flour 🌾 | 2 ¼ cups | Sifted for light texture |
| Unsalted Butter 🧈 | 1 cup | Cold, cubed for flaky crust |
| Granulated Sugar 🍚 | ½ cup | Plus 2 tbsp for sprinkling |
| Large Eggs 🥚 | 1 whole | Room temperature preferred |
| Vanilla Extract 🌿 | 1 tsp | Pure, high-quality extract |
| Cream Cheese 🧀 | 16 oz | Room temperature, full-fat |
| Sour Cream 🥛 | ½ cup | Full-fat for creaminess |
| Ground Cinnamon 🌶️ | 1 tsp | Freshly ground preferred |
| Salt 🧂 | ½ tsp | Diamond Crystal preferred |
| Apples 🍏 | 3 medium | Honeycrisp or Granny Smith |
| Lemon Juice 🍋 | 1 tbsp | Freshly squeezed |
| Brown Sugar 🍚 | 2 tbsp | Lightly packed |
| Ground Nutmeg 🌿 | ¼ tsp | Freshly grated preferred |
The crust starts with cold butter—this is non-negotiable for flakiness. Plugrá brand or Land O'Lakes work best, but any unsalted butter with good fat content will do. Flour matters too: King Arthur or Gold Medal sifted before measuring creates that signature lightness. I always buy my cinnamon from Penzeys—it's worth the splurge for that warm, authentic flavor. For the apples, Honeycrisp or Granny Smith hold their shape during baking, but any firm apple will work if you peel and slice them uniformly. The secret to caramelized apples? Low-and-slow cooking in a nonstick skillet—don't rush it.
No vanilla extract? Vanilla bean paste works in a pinch, or scrape seeds from a pod. Running short on cream cheese? Substitute with equal parts mascarpone and sour cream—it's richer but still delicious. The apples can be prepped ahead: peel, core, and slice them, then toss with lemon juice to prevent browning. Trader Joe's has pre-sliced apples in the freezer section if you're truly pressed for time. For the crust, if you don't have a pie crust shield, use dried beans or rice as a weight—just don't forget to remove them before baking. And that nutmeg? If you only have whole nutmeg, grate it fresh—it makes all the difference.
Store unbaked tart shells in the fridge for up to 2 days—just blind-bake them when ready. The cheesecake filling keeps 3 days in the fridge, but the apples should be added fresh before baking. Once assembled, these tarts hold up beautifully for 4 days in the fridge. For make-ahead magic, bake the tarts without the apple topping, then refrigerate. Add the apples and bake just before serving—they'll caramelize perfectly. Freeze unbaked tarts (without apples) for up to 2 months—thaw overnight in the fridge before baking.
Why You'll Love This Recipe
- Foolproof Layers: I swear, the crust comes together with just butter and flour—no rolling required. Just mix, press, bake, and you’ve got that buttery shortbread base that holds up like a dream.
- Apple Cheesecake Magic: That creamy filling with eggs and sugar? It’s like dessert hugging you. Add sliced apples on top, and suddenly you’ve got a perfect balance of tangy, sweet, and rich—no overpowering flavors here.
- Weeknight Hero: Between us, this is my go-to when I need something impressive but fast. Serve it warm with a scoop of vanilla ice cream, and suddenly you’re hosting a dinner party—no stress, just flavor.
- Budget-Friendly Luxury: Honestly, this recipe costs me pennies but tastes like a bakery treat. The ingredients are basic, but the result? That crispy crust with the velvety filling? It’s the kind of dessert that makes you feel fancy without breaking the bank.
Step-by-step instructions for apple cheesecake tarts
Here's how to create these irresistible tarts with a buttery crust and spiced apple filling.
🍳 Step 1: Make the Perfect Buttery Crust
In a food processor, pulse the 2.25 cups All-Purpose Flour and 0.5 tsp Salt together until combined. Add the 1 cup Unsalted Butter, cut into cubes, and pulse until the mixture resembles coarse crumbs with pea-sized butter pieces. This texture is crucial—it creates flaky layers rather than a dense crust.
Transfer the mixture to a bowl and mix in 0.5 cup Granulated Sugar and 0.25 tsp Ground Nutmeg using a fork until evenly distributed. The nutmeg adds warmth that pairs beautifully with the apples. Press 2 tablespoons of this mixture into the bottom and up the sides of each of six 4-inch tart pans. Chill in the refrigerator for 30 minutes while you prepare the filling.
👨🍳 Step 2: Prepare the Cream Cheese Filling
In a large mixing bowl, beat the 16 oz Cream Cheese and 0.5 cup Sour Cream together with an electric mixer until completely smooth and creamy. This step is essential—any lumps will make your filling grainy. Gradually add 0.5 cup Granulated Sugar, 1 whole Large Eggs, 1 tsp Vanilla Extract, 1 tsp Ground Cinnamon, and mix until fully incorporated and light in color.
Here's the thing—don't overmix. You want a thick but pourable consistency that will hold its shape when baked. If it's too thick, add 1 tablespoon of milk or water to loosen it slightly. The filling should coat the back of a spoon but still hold its shape when dropped from a spoon.
🍳 Step 3: Cook the Spiced Apple Filling
Peel, core, and dice the 3 medium Apples into small, even pieces—about ¼-inch cubes. Toss them with 1 tbsp Lemon Juice, 2 tbsp Brown Sugar, and 0.25 tsp Ground Nutmeg in a bowl. This mixture prevents browning and enhances the apple flavor. Let it sit for 10 minutes while you preheat the oven to 350°F.
In a skillet over medium heat, cook the apple mixture for 8-10 minutes until tender but still holding its shape. You want them to soften but not turn to mush—this ensures a perfect texture in your tarts. Transfer the cooked apples to a bowl and let them cool slightly before assembling.
🥘 Step 4: Assemble and Bake the Tarts
Preheat your oven to 350°F. Remove the chilled tart shells from the refrigerator and evenly divide the cream cheese filling among them, spreading it to the edges. The filling should be about ¼-inch thick—this ensures a perfect balance of flavors in each bite. Sprinkle the cooled apple mixture evenly over the cream cheese layer.
Bake for 30-35 minutes until the crust is golden brown and the filling is set but still slightly jiggly in the center. Here's where it gets tricky—don't overbake. The tarts will continue cooking slightly as they cool, and you want that perfect creamy texture. Rotate the pans halfway through for even baking.
⏰ Step 5: Finish and Serve Warm
Remove the tarts from the oven and let them cool for 10 minutes before serving. This resting period allows the filling to set completely and prevents any potential collapse. Dust the tops with a little extra Ground Cinnamon or a sprinkle of Brown Sugar for added flavor and presentation.
Serve warm for the best experience—the contrast of the warm apples with the creamy cheesecake filling is pure magic. These tarts are perfect for breakfast, dessert, or even an afternoon snack. Store leftovers in the refrigerator for up to 3 days, but I promise they won't last that long!
Pro Tips For Making Apple Cheesecake Tart
- Chill the Egg Mixture: After mixing your eggs, sugar, butter, and vanilla for the filling, pop the bowl in the fridge for 15–20 minutes before baking. I used to skip this and ended up with a dense, undercooked center—this pause lets the custard set properly so it holds its shape and bakes evenly.
- Prevent Overmixing the Dough: Once you add the butter to the flour for the crust, mix just until crumbly—no more than 10 strokes with a fork or your fingers. Overworking it turns the crust into tough, greasy paste. My first batch looked perfect until it turned into a chewy brick after baking.
- Use Cold Apples: Slice your apples right before adding them to the tart and keep them in an ice bath until assembly. Warm apples release too much juice, making the filling soggy. I learned this the hard way when my first attempt turned into a watery mess—now I keep them cold until the last second.
- Bake in Stages: Start the tart at 350°F (175°C) for 20 minutes, then drop the heat to 300°F (150°C) for the remaining 30–40 minutes. This two-step approach prevents a golden crust while keeping the filling creamy. I used to bake it all at once and ended up with a burnt top and underdone center—now it’s foolproof.
Essential equipment for perfect results
Tart Pans
You’ll need six 4-inch tart pans with removable bottoms for perfect individual servings. I recommend Wilton Perfect Results Tart Pans—they’re sturdy, have high sides to prevent overflow, and release cleanly.
If you only have one pan, bake them in batches, but don’t overcrowd the oven. For a budget-friendly option, Nordic Ware 4-inch Tart Pans work just as well. 🍰
Food Processor
A food processor is essential for creating the flaky crust. The Cuisinart DFP-14BCNY is my go-to—it handles the cold butter and flour efficiently without overworking the dough.
If you don’t have one, a stand mixer with a paddle attachment works too, but pulse the butter and flour by hand first to avoid overmixing. For small batches, a handheld mixer or even a pastry cutter with a fork will do in a pinch.
Skillet for Apples
Use a nonstick 10-inch skillet (like All-Clad Stainless Steel) to caramelize the apples—it prevents sticking and ensures even cooking. If you don’t have nonstick, a well-seasoned cast-iron skillet works too, but add a little butter or oil to prevent burning.
Avoid aluminum—it reacts with acidic ingredients like lemon juice. A medium heat setting is key to achieving that perfect tender-crisp texture. 🍏
Mixing Bowls
Invest in two medium mixing bowls—one for the crust and one for the cheesecake filling. I love Pyrex glass bowls because they’re heat-resistant and easy to clean. For the filling, a non-reactive stainless steel bowl prevents any metallic taste from mixing.
If you’re short on space, a large ceramic bowl works too, but avoid plastic—it can retain odors and affect the flavor.
Electric Mixer
An electric mixer (like the KitchenAid Artisan Series) is a game-changer for the cheesecake filling—it ensures a smooth, lump-free texture. If you don’t have one, a hand mixer works, but be patient and mix on low speed to avoid splattering.
For a no-mixer option, whisk the cream cheese and sour cream by hand until fully combined, then gradually add the other ingredients. The key is patience—don’t rush this step, or you’ll end up with a grainy filling. 💪
Measuring ToolsPrecision is everything in baking, so grab a set of measuring cups and spoons—I swear by OXO Good Grips for their accuracy and ease of use. A digital kitchen scale is even better for the flour and butter, especially if you’re new to baking. For the apples, a mandoline slicer (like Benriner) ensures uniform cuts, but a sharp chef’s knife works too if you’re careful. Don’t skip measuring the spices—Penzeys measuring spoons are my favorite for their precision. ⚖️
Nutrition facts
Frequently asked questions
Can I make these tarts without a food processor?
For the crust, cut the 1 cup cold butter into small cubes and use a pastry cutter or your fingers to work it into the flour until it resembles coarse crumbs. The key is keeping everything cold—this prevents the butter from melting and creating a tough crust. Just be gentle to avoid overworking the dough.
How do I prevent the cheesecake filling from cracking?
Cracking usually happens when the filling bakes too quickly or the oven temperature fluctuates. First, ensure your oven is fully preheated to 350°F. Place the tarts on the middle rack for even heat circulation, and avoid opening the oven door during baking. For extra insurance, chill the assembled tarts in the refrigerator for 15 minutes before baking.
What's the best way to store leftovers?
Store cooled tarts in an airtight container in the refrigerator for up to 4 days. For longer storage, freeze unbaked tart shells (without apples) for 2 months. Thaw overnight in the fridge, then add fresh apple topping and bake as directed. The crust stays crisp, while the filling remains creamy when reheated briefly in the oven.
Can I substitute the apples with another fruit?
Yes! For a similar texture, try peaches or pears—they caramelize beautifully. For a tart contrast, rhubarb or berries work well too, but reduce the cooking time to 5-7 minutes to avoid overcooking. Just adjust the spices: add extra cinnamon for berries or a pinch of ginger for peaches.
Why did my crust turn out dense instead of flaky?
Dense crusts usually happen when the butter melts during mixing or the dough is overworked. Always use cold butter and pulse just until crumbly. Avoid handling the dough more than necessary, and don't skip chilling it for 30 minutes before baking. If the butter gets warm, place the bowl in the freezer for 5 minutes to reset the texture.