
Desserts
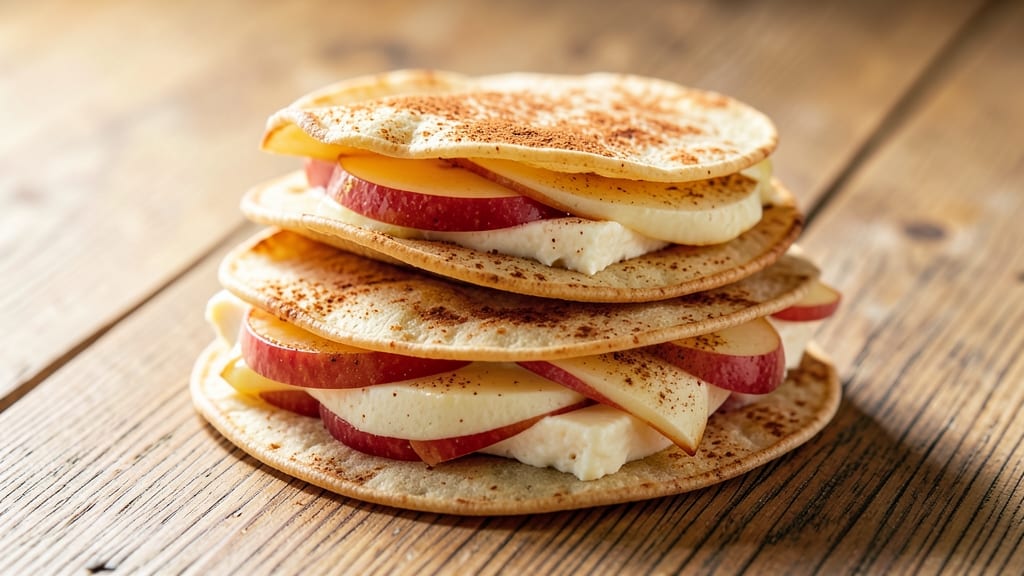
This apple cheesecake tacos recipe transforms dessert into an interactive, crunchy-sweet experience that’s impossible to resist. 🌟 The magic lies in crispy tortilla shells—baked until golden and sturdy enough to hold gooey cheesecake filling infused with spiced apples.
What started as a playful fusion idea became my go-to for parties and special occasions, where every bite delivers a perfect balance of textures and flavors.
The secret to success is the cheesecake filling: creamy yet firm enough to hold its shape, with just the right amount of apple purée for tangy depth.
We bake the tortilla shells ahead of time to ensure they stay crispy, then fill them with this dreamy mixture and top with caramelized apple slices for extra richness. The result?
A dessert that’s equal parts indulgent and fun—like a cheesecake, a taco, and an apple pie all rolled into one.
What makes this recipe truly special is how it plays with contrasts: the crispy shell against the velvety cheesecake, the sweet apples cutting through the richness, and the option to add a sprinkle of cinnamon or a drizzle of honey for extra flair.
It’s the kind of dessert that feels impressive yet comes together with simple techniques—perfect for impressing guests without spending hours in the kitchen.
These tacos are ideal for gatherings, but they’re also great for a solo treat—just assemble them on a platter with toppings like whipped cream or crushed graham crackers.
The best part? You can prep the filling and shells ahead, so all that’s left is to assemble when ready. Let’s get started!
Ingredients for apple cheesecake tacos
Twelve crispy shells, gooey filling, and apples that taste like autumn in every bite—this is dessert reinvented.
| Ingredient | Amount | Notes |
|---|---|---|
| Large Flour Tortillas 🌯 | 12 whole | Corn or flour, 10-inch diameter |
| Cream Cheese 🧀 | 16 oz | Full-fat, room temperature |
| Granulated Sugar 🍚 | ¾ cup | For sweetness balance |
| Large Eggs 🥚 | 4 whole | Room temperature |
| Vanilla Extract 🌿 | 1 tbsp | Pure vanilla preferred |
| Ground Cinnamon 🌶️ | 1 tsp | For apple warmth |
| Apples 🍎 | 4 medium | Honeycrisp or Fuji, peeled |
| Lemon Juice 🍋 | 1 tbsp | Freshly squeezed |
| Unsalted Butter 🧈 | ½ cup | Cold, cubed |
| Powdered Sugar 🍚 | ¼ cup | For dusting |
| Caramel Sauce 🍯 | ½ cup | Store-bought or homemade |
| Whipped Cream 🍦 | 1 cup | For serving |
| Crushed Graham Crackers 🍪 | ½ cup | For garnish |
The tortillas are the foundation—flour tortillas work best for that perfect crisp, but corn tortillas add a fun twist. Grab the 10-inch size from Trader Joe's or your local Mexican market—they're the right balance of sturdy and crispy. For the apples, Honeycrisp or Fuji are your best bets—they hold up to baking and stay juicy. If you're prepping ahead, peel and chop them first, then toss with lemon juice to keep that bright color. The cream cheese? Full-fat only—it's what gives that luscious texture. I always buy the Philadelphia brand because it's consistent, but any good block-style cream cheese works.
No vanilla extract? Vanilla bean paste or even vanilla sugar will do in a pinch. The cinnamon is non-negotiable for that apple pie vibe, but if you want to kick it up, swap in half a teaspoon of cardamom for something unexpected. For the apples, if you can't find Honeycrisp, Gala or Pink Lady are solid seconds. The caramel sauce can be store-bought—Trader Joe's makes a great one, or you can make your own in 10 minutes with butter, sugar, and cream. The whipped cream should be lightly sweetened—none of that heavy stuff. And if you're feeling fancy, swap the graham crackers for crushed pretzels or toasted pecans for a salty crunch.
The tortillas crisp up best when baked in advance—350°F for 10-12 minutes until golden. Store them in an airtight container with parchment between layers for up to 3 days. The cheesecake filling keeps in the fridge for 4 days, but it's even better the next day as the flavors meld. For the apples, if you're prepping ahead, toss the chopped pieces with a tiny bit of sugar and lemon juice, then refrigerate in a sealed container for up to 2 days. The caramel sauce and whipped cream can be stored separately in the fridge for 1 week, so you can assemble these tacos whenever the craving hits.
Why You'll Love This Recipe
- No-Bake Magic: I swear, this recipe only needs a bowl and a microwave. You mix cream cheese, sugar, eggs, and vanilla—no baking, no fuss—and suddenly you’ve got a dessert filling so smooth it’ll make you question why you ever bought store-bought cheesecake.
- Sweet-Savory Balance: That caramelized apple meets the tangy cream cheese filling in the tortilla? It’s like dessert and brunch had a baby. Honestly, the first bite makes me forget it’s technically a taco.
- Weeknight Hero: Between us, this is my go-to when I need something impressive but zero effort. Pack it for lunch, serve it at a potluck, or just eat it straight from the fridge—it’s always a hit.
- Leftovers? Best Part: The filling keeps for days, and the tortillas stay fresh if you wrap them right. I’ll be real: I’ve reheated these tacos cold, and they’re still better than takeout. (Yes, even on a Tuesday night.)
Step-by-step instructions for apple cheesecake tacos
Here's how to create crispy tortilla crowns stuffed with gooey apple-cheesecake filling.
🍳 Step 1: Bake the Apple Filling to Perfection
Preheat your oven to 350°F. In a large bowl, combine the 4 medium apples (peeled and finely diced), 0.5 cup unsalted butter (cubed), 0.75 cup granulated sugar, and 1 tsp ground cinnamon. Toss until the apples are evenly coated and the butter is melted.
Transfer the mixture to a greased 9x13-inch baking dish and bake for 25-30 minutes until the apples are tender and the mixture starts to bubble. Stir halfway through baking. You'll know it's ready when the apples break down into a thick, jam-like consistency with a caramelized aroma. Let it cool completely before using—this prevents the tortillas from getting soggy.
👨🍳 Step 2: Prepare the Cheesecake Filling
In a large mixing bowl, beat the 16 oz cream cheese and 0.5 cup unsalted butter (softened) together until smooth and creamy. Add the 4 whole large eggs one at a time, mixing well after each addition. Then stir in the 0.75 cup granulated sugar, 1 tbsp vanilla extract, and the cooled apple mixture.
Mix until everything is fully combined and the texture is smooth like thick pudding. The filling should be thick enough to hold its shape but still spreadable. If it feels too thick, add 1-2 tablespoons of lemon juice to loosen it slightly. This step is where all the flavors come together—don't rush it. Taste a small spoonful to ensure the sweetness and spice balance are perfect.
🔥 Step 3: Assemble and Bake the Tacos
Preheat your oven to 375°F and line two baking sheets with parchment paper. Warm the 12 whole large flour tortillas in the microwave for 20-30 seconds** each (wrapped in a damp paper towel) to make them more pliable. This prevents cracking when you add the filling.
Spread about 2 tablespoons of the cheesecake filling onto each tortilla, leaving a ½-inch border around the edges. Fold the tortillas in half, then fold them in half again to create a compact square (like a taco). Place them seam-side down on the prepared baking sheets. Bake for 15-18 minutes until the edges are golden brown and the filling is set but still slightly jiggly in the center.
🥘 Step 4: Create the Crispy Crowns
While the tacos are still warm, carefully cut each square into four triangular pieces, cutting from the center outward. This creates those beautiful "crown" shapes. Transfer them to a wire rack set over a baking sheet and broil for 1-2 minutes on each side until they're deep golden brown and crispy—this is where the magic happens for that perfect texture.
Watch them closely to prevent burning. The edges should be crisp and slightly caramelized, while the inside remains soft and gooey. Let them cool for 5 minutes before serving—this helps them set up properly and makes them easier to handle.
🍽️ Step 5: Serve with Toppings
Arrange the crispy taco pieces on a serving platter. Drizzle generously with the 0.5 cup caramel sauce and top with dollops of 1 cup whipped cream. Sprinkle with the 0.25 cup powdered sugar and 0.5 cup crushed graham crackers for that classic cheesecake texture contrast.
Serve immediately while everything is still warm and gooey. Each bite should deliver that perfect balance of crispy tortilla, creamy cheesecake, spiced apple, and rich caramel. For an extra touch, add a few extra crushed graham crackers on top of each serving—it's the perfect finishing flourish that ties everything together.
Pro Tips For Making Apple Cheesecake Tacos
- Warm the Tortillas First: Cold tortillas crack like brittle chips when you fold them—no one wants a cheesecake taco emergency. Heat them for 10-15 seconds in a dry skillet or wrap them in a damp towel and microwave for 20 seconds. The slight softness makes all the difference when wrapping around that creamy filling.
- Whip the Cream Cheese: I used to just mix the cream cheese with sugar and eggs, but that leaves lumps like regret. Beat the cream cheese with sugar and vanilla until it’s light and fluffy—about 2 minutes with a hand mixer—before adding eggs. This keeps the filling silky, not dense, and prevents that sad, gummy texture.
- Don’t Overmix the Filling: Once you add the eggs, stir just until combined. Overmixing introduces too much air, and when you bake it, the filling can puff up and crack or sink in the middle. Think "gentle fold," not "whip it like cake batter."
- Peel and Dice Apples Last: Apples oxidize fast—turning your pretty filling brown before it even hits the pan. Peel, core, and dice them right before baking, then toss with a teaspoon of lemon juice if you’re prepping ahead. Fresh apples keep the filling bright and the flavor sharp.
Serving suggestions for this dish
Plating Like a Pro
Start by arranging the crispy taco crowns on a large platter or individual plates in a sunburst pattern—this makes them look like a dessert masterpiece. I like to place 3-4 crowns per person so everyone gets a taste of all the textures.
Use a small offset spatula to gently lift and position them without breaking the edges. For extra flair, dust the platter with powdered sugar through a fine-mesh sieve before adding the tacos—this creates a snowy effect that looks stunning with the golden-brown crowns. 🌟
Topping Variations
Keep the classic trio of caramel sauce, whipped cream, and crushed graham crackers as your base, but don’t be afraid to get creative. For a spiced twist, add a pinch of cinnamon or nutmeg to the whipped cream before dolloping it on top.
If you want crunch, swap graham crackers for toasted pecans or crushed pretzels. For a tropical vibe, drizzle with mango purée instead of caramel—it pairs surprisingly well with the apple-cheesecake combo.
Serving Style Options
For a party-friendly setup, serve these tacos in mini muffin tins—each crown fits perfectly in one cup, making them easy to grab and eat. For a restaurant-worthy presentation, arrange them on a slate board with a dark chocolate drizzle running through the center.
If you’re serving a crowd, set up a DIY topping bar with small bowls of caramel, whipped cream, and crushed graham crackers so guests can customize their own. This is especially fun for kids!
Pairing with Drinks
A sparkling apple cider (chilled) is my go-to drink pairing—it complements the apple flavors without overpowering them. For something stronger, a bourbon or apple brandy adds a sophisticated touch. If you’re serving these at a brunch, a vanilla latte or chai tea balances the sweetness beautifully.
Avoid heavy, creamy drinks like milkshakes—they’ll make the tacos taste even richer than they already are!
Make-Ahead Serving Tips
Assemble the tacos up to 2 days ahead and store them in an airtight container at room temperature. Re-crisp them in a 350°F oven for 5-7 minutes before serving. For the toppings, keep the caramel sauce and whipped cream refrigerated in separate containers.
Just before serving, reheat the caramel slightly (microwave for 10-15 seconds) to make it pourable. The tacos will taste just as fresh as the day you made them! ⏰
Garnish Like a Baker
Before serving, add edible gold leaf or a sprinkle of cocoa powder for a bakery-style finish. A drizzle of honey or maple syrup adds a glossy sheen that makes the tacos look even more enticing.
For a festive touch, pipe the whipped cream into roses using a pastry bag with a star tip. The key is to keep garnishes light—you don’t want to overwhelm the natural flavors of the tacos themselves.
Nutrition facts
Frequently asked questions
Can I make these apple cheesecake tacos ahead of time?
The tortilla shells can be baked and stored in an airtight container for up to 3 days, while the cheesecake filling keeps in the fridge for 4 days. For the best results, assemble the tacos 1 day ahead and re-crisp in a 350°F oven for 5-7 minutes before serving. Just keep toppings like caramel and whipped cream separate until ready to use.
What's the best way to keep the tortilla shells crispy?
Bake the shells at 375°F for 15-18 minutes until golden brown, then store them in an airtight container with parchment paper between layers. For extra crispiness, broil for 1-2 minutes after cutting into crowns—just watch them closely to avoid burning!
Can I use corn tortillas instead of flour?
Yes! Corn tortillas work perfectly and add a fun texture contrast. They crisp up slightly differently but still hold the filling beautifully. Just be aware they'll be slightly more delicate—handle them gently when folding. For extra stability, warm them in the microwave for 20-30 seconds before filling.
How do I fix runny cheesecake filling?
If your filling is too thin, it's likely undercooked. Return it to the oven for 5-10 minutes at 350°F to set it up. For future batches, ensure your eggs are fully mixed in and the filling bakes long enough to reach 160°F internal temperature. A quick fix is to chill the filling for 1 hour before assembling.
What's the secret to perfect apple flavor?
The key is using Honeycrisp or Fuji apples—they stay juicy when baked. Toss them with lemon juice before baking to prevent browning, and don't overcook them. The filling should be thick like jam, not watery. For extra depth, add ½ tsp cinnamon + pinch of nutmeg to the apple mixture before baking.